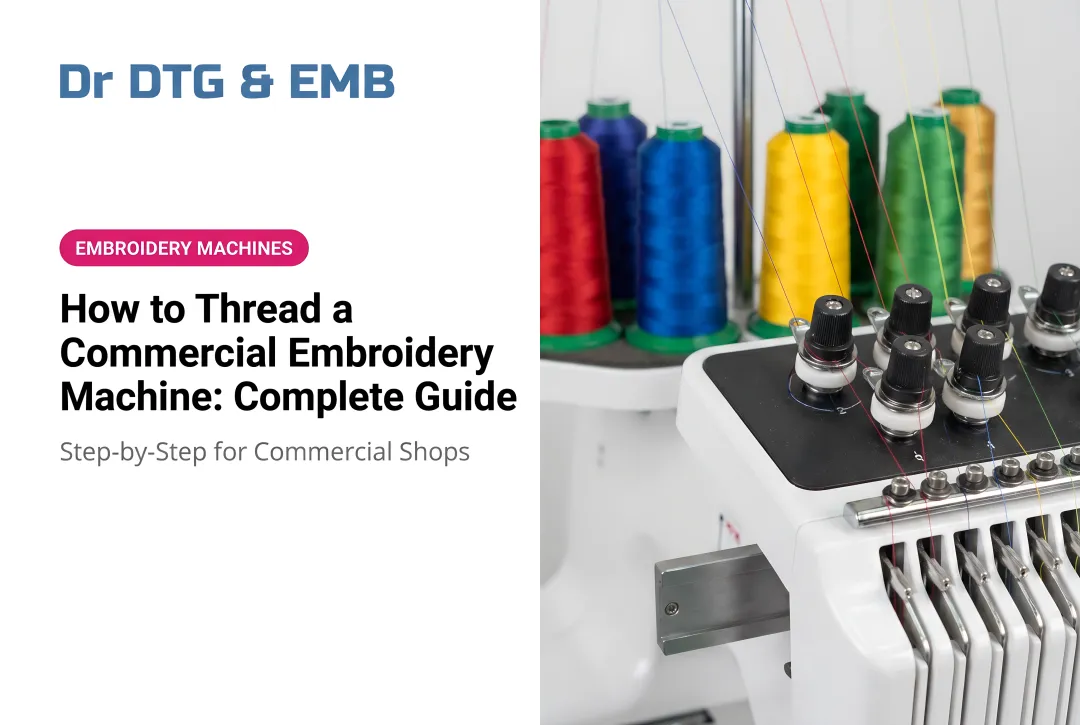
That confusion is completely normal. Machine embroidery has a steeper learning curve than most beginners expect, but the underlying logic is consistent once you understand the fundamentals. This guide walks you through everything that matters: the supplies you actually need, how to choose thread and stabilizers, proper hooping technique, core stitch types, and which products sell best if you're considering turning embroidery into a business.
Key Takeaways
- Match your stabilizer to your fabric type first — this single decision drives stitch quality more than anything else
- Start with polyester #40 weight thread; it's the most forgiving option for beginners
- Practice on scrap fabric before committing to real projects
- Buy pre-digitized designs rather than attempting to create your own at the start
- Begin with flat-fabric items like towels or tote bags before moving to hats or cuffs
Essential Supplies to Get Started with Machine Embroidery
Before your first stitch, you need the right tools assembled. Starting with the wrong supplies leads to specific, avoidable failures — thread shredding, fabric puckering, and skipped stitches that waste both material and time.
Your core supply list:
- Embroidery machine (commercial or home multi-needle)
- Embroidery thread (at least a starter color set)
- Pre-wound or wound bobbins
- Stabilizers — have at least two types on hand
- Embroidery needles in multiple sizes
- Sharp embroidery scissors
- Fabric marking pen for centering designs
- Basting spray adhesive
- Seam ripper (you will use this)
- Small lint brush for machine maintenance
Needles: Not All Are Created Equal
Embroidery needles differ from standard sewing needles in two important ways. They have a larger eye to accommodate decorative threads, and a specially designed scarf to reduce friction and prevent shredding. SCHMETZ and Superior Threads both identify wrong needle type as a leading cause of thread damage and skipped stitches.
For standard #40 polyester thread, use a size 75/11 needle as your default. Move to an 80/12 for heavier applications or 3D puffy foam work — Dr. DTG stocks Groz-Beckert 80/12 KK needles specifically designed for foam embroidery on both knitted and woven fabrics.
Choosing the Right Hoop
Impressions Magazine recommends using the smallest hoop that fits your design — this keeps the fabric as stable as possible during stitching. Have at least two or three sizes on hand from the start.
For delicate fabrics, magnetic hoops reduce stress on the material compared to screw-tightened standard hoops — worth having in your kit if you plan to work with knits or lightweight garments.
Once your supplies are assembled, read your machine manual cover to cover before stitching a single thread. It covers threading, bobbin loading, design import, and model-specific troubleshooting — the answers to your first ten beginner questions are already in there.
Thread Types and Why Quality Matters
Thread choice affects every aspect of your results: color vibrancy, tension consistency, how often the thread breaks, and how your finished piece looks after washing.
The Three Main Thread Types
| Thread Type | Finish | Best For | Durability |
|---|---|---|---|
| Polyester #40 | Subtle sheen | Everything — ideal starting point | Excellent |
| Rayon #40 | High sheen | Items worn against skin | Moderate |
| Cotton | Matte | Pot holders, quilts, heat-exposed items | Good |
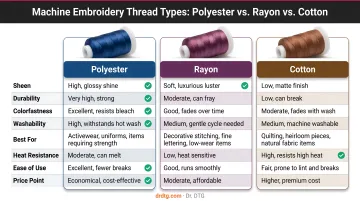
Start with polyester #40 weight and stay there until you're confident. Impressions Magazine (2025) identifies it as the most commonly used thread in machine embroidery for good reason — it's strong, colorfast, and consistent under tension.
Why Budget Thread Costs You More
Poor-quality thread causes real, recurring problems that are easy to misdiagnose as machine issues. Impressions Magazine directly attributes these failures to thread quality, not machine faults. Common symptoms include:
- Thread breaks mid-stitch, interrupting your run
- Lint buildup in the bobbin case requiring frequent cleaning
- Tension problems that mimic machine faults
- Slower sew speeds to compensate for inconsistency
You end up spending time troubleshooting what is actually a materials problem.
Isacord polyester thread is engineered for high-speed running without looping or puckering, with nearly twice the strength of rayon. Dr. DTG carries the full catalog as the USA Master Distributor — 390 colors, priced at $5.29 per 1000m spool or $9.95 per 5000m spool. A 50-color starter kit is available for $222.50 if you want a curated range without selecting individually.
Specialty Threads
Metallic, variegated, and glow-in-the-dark threads all have their place — just not yet. Each specialty thread type has its own requirements: metallic needs a needle with an elongated eye and a slower sew speed, while variegated threads demand careful color placement planning. Get comfortable with standard polyester before adding these variables.
Bobbin Thread
In machine embroidery, bobbin thread does not need to match your top thread color. Use a single neutral color (white or black) lightweight bobbin thread throughout the entire design. Pre-wound bobbins save setup time noticeably — wind multiple bobbins before starting any long project.
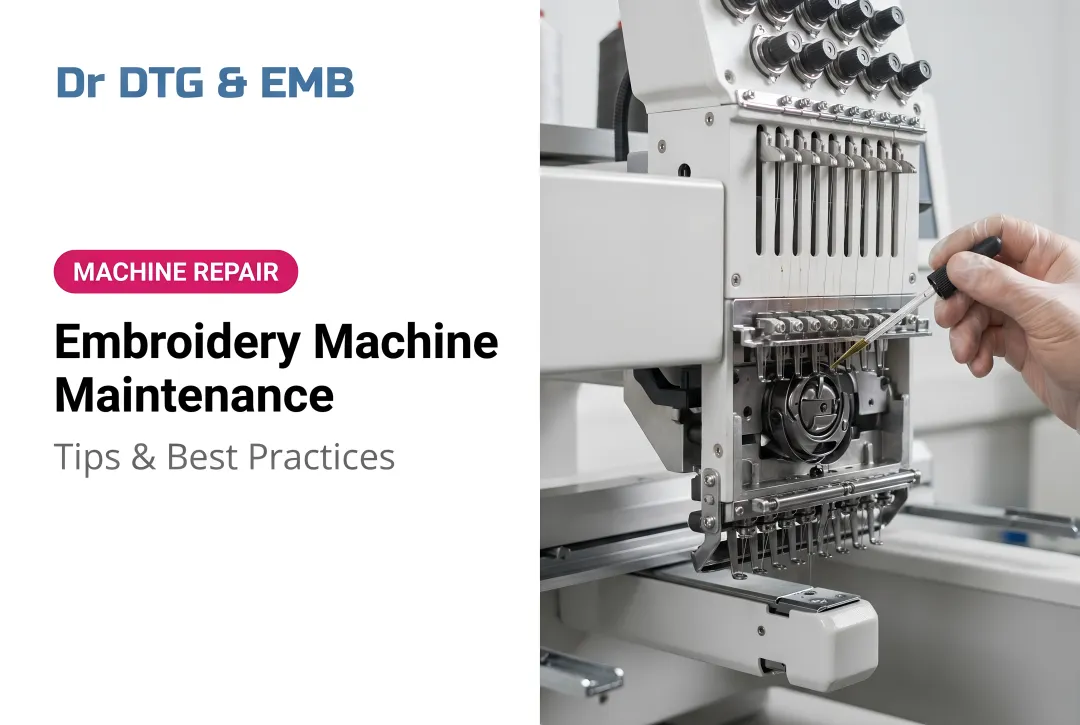
Stabilizers and Hooping: The Foundation of Every Great Stitch
This is the most misunderstood aspect of machine embroidery. Even with a quality machine and premium thread, the wrong stabilizer produces puckered, distorted results.
The Four Stabilizer Types
According to OESD's stabilizer guide:
- Cut-Away — Permanent backing that stays in the garment. Use for stretchy fabrics: knits, fleece, sweaters. This is the most commonly needed type for apparel.
- Tear-Away — Removed after stitching. Use for stable woven fabrics: cotton quilting fabric, canvas, duck cloth, vinyl, leather.
- Wash-Away (Water-Soluble) — Dissolves in water. Use for delicate or sheer fabrics, or as a topping on textured surfaces like terry cloth.
- Specialty / Adhesive-Backed — For items that can't be hooped directly: collars, napkin corners, ball caps.
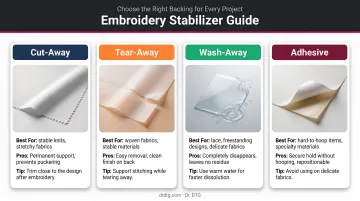
Match the stabilizer to the fabric first — everything else follows from that choice.
Hooping Technique
Brother's 2025 hooping guidance describes the target tension as "drum tight but not stretched" — taut, with no bubbles or loose areas. Over-stretching causes puckering once the item is removed from the hoop.
Proper hooping sequence:
- Hoop the stabilizer first
- Mark the center and alignment axis on your fabric
- Adhere fabric on top using basting spray or pins
- Test tension — the fabric should feel like a tambourine drum
- Do not tighten the hoop knob excessively after hooping
The Floating Method
For items that can't be hooped directly — hats, cuffs, baby onesies — hoop only the stabilizer, score the top layer to expose the adhesive surface, then position the item on top and secure with pins or spray. Stability is marginally reduced compared to direct hooping, but it handles most curved and small items reliably.
Once hooping is sorted, there's one more prep step for fabrics with a high pile or texture.
Topping for Textured Fabrics
Madeira confirms that water-soluble topping prevents stitches from sinking into high-pile fabrics like terry cloth, velvet, and fleece. Place the topping film on top of your fabric before stitching. It dissolves completely in water after the design is complete, leaving crisp stitch definition rather than thread buried in the pile.
Core Machine Embroidery Techniques for Beginners
Understanding what your machine is actually doing makes troubleshooting easier and design selection more intentional.
The Three Primary Stitch Types
Running stitch: A single line of stitches used for outlines, fine details, and underlay. The simplest stitch type, but foundational to nearly every design.
Satin stitch: Closely packed parallel stitches that create smooth, glossy columns. Wilcom describes it as high-density and suited for borders, lettering, and narrow shapes. The parallel arrangement creates a sheen that makes text and borders pop.
Fill stitch (tatami): Dense stitches that cover large closed areas with a flat, textured appearance. Lower density than satin, but it covers more area efficiently — making it the go-to for backgrounds and large design elements that need solid color.
Appliqué
Appliqué combines fabric pieces with embroidery and is genuinely beginner-friendly. The sequence works like this:
- Machine stitches a placement line to show you exactly where fabric goes
- Place a cut piece of fabric over the placement area
- Machine stitches a tack-down line to lock the fabric in place
- Machine adds a satin stitch border to cleanly finish the edge
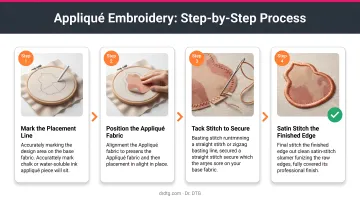
This technique is faster than dense fill stitching for large areas and adds real texture and dimension to finished pieces. For beginners working on hats, bags, or apparel, it's one of the most efficient ways to get polished results quickly.
In-the-Hoop (ITH) Projects
ITH projects complete entirely within the embroidery hoop — no additional sewing required. That's what makes them ideal for beginners: the machine does most of the construction work, and you end up with a finished item straight from the hoop.
Popular starter ITH projects include:
- Mug rugs and coasters
- Bookmarks and key fobs
- Zipper pouches
- Ornaments and luggage tags
OESD and Urban Threads both carry extensive ITH design libraries — a solid starting point once you're comfortable hooping and threading.
What Machine-Embroidered Items Sell the Most
If you're considering turning embroidery into a business, the product categories with consistent demand are fairly predictable.
Top-selling categories:
- Custom apparel — Embroidered hats, polo shirts, and jackets with logos or names. According to PPAI's 2024 sales volume report, wearables represented 26.6% of total U.S. promotional products sales, with caps and hats alone accounting for 9.0% of sales volume.
- Monogrammed home goods — Towels, pillowcases, and baby blankets. Personalized items in this category have strong gift-purchase demand year-round.
- Baby items — Personalized onesies, blankets, and bibs. High gift value, relatively simple construction.
- Patches and appliqué — Customers apply these themselves, which simplifies your production and shipping.
Personalization Drives the Sales
Adding a name, date, or custom logo to an ordinary product dramatically increases its value. McKinsey research found that 78% of consumers are more likely to repurchase when content is personalized to them. For embroidery businesses, personalization is what justifies a premium price over retail — customers aren't buying thread and fabric, they're buying something made specifically for them.
Start with two or three product categories, master those, then expand.
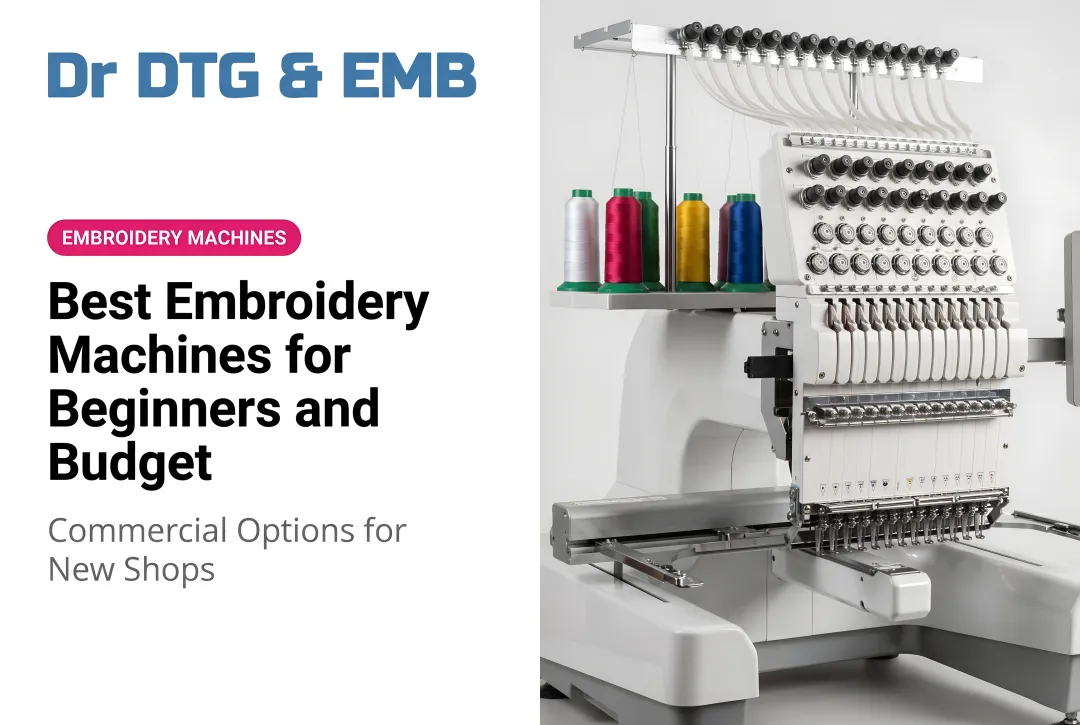
Scaling Up with Commercial Equipment
Once you've built a reliable product line, a commercial multi-needle machine lets you take on larger orders without turning jobs away. Dr. DTG's Xtreme Tech XTPro 1501 IPX handles 15-color designs without rethreading, and the Independent Presser Foot Control System (IPX) auto-adjusts per stitch and per material — eliminating skipped stitches on thick fabrics like denim, structured hats, and layered athletic wear.
The XTPro 1502 IPX (2-head) doubles production without hiring a second operator. The 1504 IPX (4-head) delivers 4x the output of a single-head machine. Dr. DTG also offers financing, pre-purchase demos, on-site training, and a 7-year warranty option, making the transition to commercial equipment more manageable for new business owners.
Frequently Asked Questions
What are the main techniques used in machine embroidery?
The four primary techniques are running stitch (outlines and detail lines), satin stitch (borders, lettering, and narrow filled shapes), fill stitch or tatami (large background areas and solid color regions), and appliqué (fabric pieces combined with embroidery stitching). Most designs use a combination of all four.
What machine-embroidered items sell the most?
Custom embroidered hats, polo shirts, and jackets lead sales volume consistently. Monogrammed towels, pillowcases, and baby items perform strongly in gift markets. Patches and appliqué designs are the top sellers for most small embroidery businesses.
What type of thread is best for machine embroidery beginners?
Polyester #40 weight is the right starting point: it's strong, colorfast, widely available, and consistent under tension. Premium brands like Isacord produce noticeably more reliable results than budget options, with fewer breaks and better color vibrancy from the first spool.
How do I choose the right stabilizer for my project?
Use cut-away for stretchy or knit fabrics, tear-away for stable woven fabrics, and wash-away either for delicate fabrics or as a topping on textured surfaces like terry cloth and velvet. Cut-away is the more forgiving choice for most apparel applications.
Do I need special software to start machine embroidery?
No. Beginners should purchase pre-made designs from reputable online vendors — OESD, Urban Threads, and Embroidery Library are established sources with design reviews and stitch count information. Digitizing software becomes useful later if you want to create original designs.
How long does it take to learn machine embroidery?
Basic machine operation takes a few sessions to learn; consistent, professional-quality results come with a few weeks to a few months of regular practice. Starting with simple flat-fabric projects before moving to complex surfaces is the fastest path to confidence.