The good news: most cases follow predictable patterns with clear fixes. This article covers why bunching happens, walks through a prioritized fix sequence, addresses embroidery-specific factors that generic sewing guides miss, and explains when it's time to call in a professional.
Key Takeaways
- Thread bunching underneath is almost always an upper thread problem — not the bobbin — even though the mess appears on the bottom
- Always rethread with the presser foot raised first; this single step resolves a majority of birdnesting cases
- Stabilizer choice, thread quality, and stitch speed are common embroidery-specific causes that standard troubleshooting skips
- Needles should be replaced when damaged, after hoop strikes, or when stitch defects first appear — don't wait
- Persistent bunching after full troubleshooting usually signals worn components or mechanical issues needing professional diagnosis
Why Does Embroidery Machine Thread Bunch Underneath?
The thread nesting on the underside of your fabric looks like a bobbin problem. It almost never is.
The needle carries the upper thread down through the fabric on each stroke, and the rotary hook picks up that thread loop to form a lockstitch — needle thread and bobbin thread interlocking mid-fabric. When the upper thread loses proper tension or control, the hook pulls it through but the take-up lever can't pull it back up cleanly.
The result is slack thread accumulating in loops underneath the fabric.
Upper Thread Tension and Threading Errors
The two most common causes are closely related:
- Threading with the presser foot down — the tension discs stay closed, so the thread never seats properly between them. The thread runs loose and uncontrolled through the entire stitch cycle
- Skipping the take-up lever — without the take-up lever controlling thread delivery, excess slack builds up with every needle stroke
- Tension set too loose — the bobbin thread can't pull the upper thread up tightly enough, and loops form on the underside. Too tight causes the opposite problem: puckering on top
Ricoma's support documentation confirms that improper threading causes looping, skipped stitches, and birdnesting on commercial embroidery machines.
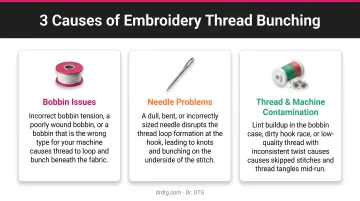
Bobbin, Needle, and Contamination Issues
While the upper thread is the primary suspect, three other factors contribute and must be ruled out:
- Bobbin problems — a bobbin inserted in the wrong direction, wound unevenly, or not properly seated disrupts lower thread tension. Tajima specifies that the bobbin case should click into place with 3–5 cm of thread extending from it
- Needle issues — a bent, dull, or wrong-type needle disrupts the thread path and causes irregular loop pickup. Embroidery needles have a larger eye and optimized scarf geometry designed to reduce skipped stitches at high speeds — using a standard sewing needle is a frequent and costly mistake
- Machine contamination — lint, thread debris, and oil buildup accumulate in the bobbin case, tension discs, and feed area, restricting thread movement and creating irregular tension over time
How to Fix Thread Bunching: Step-by-Step
Work through these steps in order. Jumping straight to tension adjustment before ruling out threading and mechanical errors almost always wastes time.
Step 1: Rethread the Upper Thread Completely
Remove all upper thread and raise the presser foot before you touch anything else. Raising the presser foot is non-negotiable: it opens the tension discs so the thread can seat properly between them.
Rethread from scratch, following your machine's exact path through every guide, the tension discs, and the take-up lever. On commercial machines like the Happy Japan HCH Plus or Xtreme Tech XTPro, this means routing through guides in sequence, winding clockwise once around the tension disc, and threading the take-up lever right to left. Only lower the presser foot when you're ready to sew.
Step 2: Remove and Recheck the Bobbin
- Remove the bobbin completely
- Check that it was wound evenly — uneven winding creates inconsistent tension
- Reinsert in the correct orientation per your machine manual (Ricoma specifies clockwise rotation when the thread is pulled)
- Listen for the click of proper seating
- Verify the thread is engaged under the tension spring
Step 3: Inspect and Replace the Needle
Hold the needle up to the light and look for bending, a flat spot, or a dull tip. Check that it's pushed fully up into the needle clamp — a needle seated even slightly low will miss the hook timing.
For commercial embroidery machines, use the correct needle type. The industry standard is DB x K5 format with a large eye (1–2 sizes larger than standard) and a distinctive scarf. Madeira's needle guide identifies 75/11 as the standard size for 40-weight embroidery thread. When in doubt, replace the needle — it costs less than any other fix on this list.
Step 4: Clean the Bobbin Area and Thread Path
Remove the throat plate and use a small brush to clear lint from the bobbin case, hook area, and feed dogs. Run a soft cloth through the tension discs to dislodge hidden debris. Check the entire thread path for snags or stuck thread fragments.
Happy Japan's maintenance documentation recommends cleaning the rotary hook area regularly and more frequently under heavy use — and this step alone clears many persistent bunching problems that rethreading won't touch.
Step 5: Test and Adjust Tension on Scrap Fabric
Once threading and mechanical checks are done, tension is your final variable. Set it to the neutral default and run several stitches on the same fabric you'll be embroidering. Read the result:
- Loops underneath → increase upper thread tension
- Bobbin thread visible on top → decrease upper thread tension
- Per AMANN's technical data, proper balance shows bobbin thread forming roughly 1/3 of the stitch surface on the back of the fabric
Adjust in small increments only, testing between each change. Never make multiple large adjustments simultaneously.

Embroidery-Specific Factors That Make Bunching Worse
Standard sewing guides cover threading and tension. They routinely miss these three factors, which are significant contributors in commercial embroidery environments.
Stabilizer Selection
Inadequate stabilizer allows fabric to shift and vibrate during stitching, creating uneven pull on both threads. The type must match the fabric:
- Cut-away stabilizer — required for stretchy fabrics like knits, T-shirts, and sweatshirts; holds more stitches than tear-away
- Tear-away stabilizer — suitable for stable wovens without stretch; not appropriate for dense designs or unstable materials
Design density matters as well. A dense fill stitch design on an under-stabilized fabric will create tension inconsistency even when everything else is set correctly.
Thread Quality and Compatibility
Using all-purpose sewing thread on a commercial embroidery machine is a common and damaging mistake. All-purpose thread isn't built for the high-speed, high-density stitch environment of a commercial machine:
- Produces more lint, which clogs tension discs and disrupts thread flow
- Has inconsistent diameter that causes uneven tension
- Breaks more frequently under commercial machine speeds
Proper embroidery thread — like Isacord 40-weight polyester (manufactured by AMANN in Germany) — uses continuous-filament construction with consistent diameter and engineered elasticity. This eliminates looping and puckering while keeping lint buildup minimal.
Dr. DTG carries the full 390-color Isacord catalog in 1000m and 5000m spools as the USA Master Distributor. The 5000m spools are especially practical for high-volume production colors like white and black.
Machine Speed
Commercial embroidery machines run between 200 and 1,800 stitches per minute. At maximum speed, dense or detailed designs give the thread delivery system less time to respond. Thread can slip off the take-up lever or lose tension during complex direction changes.
Reduce speed when troubleshooting a bunching issue, when running long stitches, or when embroidering on challenging materials. This one adjustment often eliminates marginal threading problems that wouldn't cause issues at lower speeds.
When to Fix It Yourself vs. Call a Professional
| Situation | Action |
|---|---|
| Bunching tied to threading, dirty machine, dull needle, or tension | Work through the 5-step checklist — resolves most cases |
| Bobbin case cracked, needle plate scratched, or tension discs visibly worn | Replace the component; these are user-serviceable consumables |
| Bunching continues after all troubleshooting steps completed | Contact a professional |
| Machine mechanically locked and thread can't be cleared | Professional repair required |
| Grinding, clicking, or unusual mechanical sounds | Stop the machine; professional inspection needed |
Brother's technical documentation explicitly warns against using a bobbin case that is scratched or burred — the upper thread can tangle and needles can break. Happy Japan's technical documentation notes that burrs on the needle plate or rotary hook from hoop strikes require polishing with fine abrasive material. Rotary hook timing (checked at 25 degrees with a 0.1–0.15 mm hook-to-needle clearance) and take-up lever replacement fall into the same category — these go beyond what most operators should handle on their own.
If you've completed all troubleshooting steps and bunching continues, Dr. DTG offers repair support across the USA. Southern California customers receive on-site service; customers in other states can ship their machine to Dr. DTG's Brea, California facility for depot repair. Submit a ticket at drdtg.com/submit-ticket or call 714-770-0969 for a service quote.
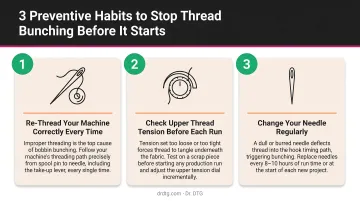
Preventive Habits That Stop Bunching Before It Starts
Three consistent habits prevent the majority of recurring thread bunching issues:
Clean after every project session. Remove the throat plate and brush lint from the bobbin case, hook area, and feed dogs after each use. Happy Japan's maintenance documentation recommends one drop of oil on the hook race every 8 hours and needle bar lubrication every 40 hours — follow your specific machine's schedule.
Thread with the presser foot raised — every single time. After every thread break, after every color change, no exceptions. This one step takes a second to do and skipping it causes more birdnesting than almost any other mistake.
Replace needles based on condition, not just a schedule. Madeira's data suggests an average lifespan of 8 hours, but Barudan notes that no fixed schedule fits all commercial applications. Replace immediately after any hoop strike, when stitch defects begin appearing, or at the first sign of visible damage. A new needle costs cents; reworking a birdnested garment costs significantly more.
Frequently Asked Questions
Why is my embroidery thread bunching up underneath the fabric?
Bunching underneath almost always means the upper thread has lost proper tension — most often because the machine was threaded with the presser foot down. With the tension discs closed, the thread bypasses them entirely and runs uncontrolled. Raise the presser foot and fully rethread the upper path as the first fix.
How do I fix birdnesting on an embroidery machine?
Work through the steps in order:
- Rethread the upper thread with the presser foot raised
- Remove and recheck bobbin orientation and seating
- Inspect the needle and replace if bent, dull, or wrong size
- Clean the bobbin area and full thread path
- Test tension on scrap fabric and adjust in small increments
Can the wrong bobbin tension cause thread to bunch underneath?
Bobbin tension can contribute, but it's rarely the primary cause. Upper threading errors are far more common. Only adjust bobbin tension in small increments after you've completely ruled out upper thread issues — incorrect bobbin adjustment on top of an upper threading problem makes diagnosis much harder.
Does thread quality affect thread bunching in embroidery machines?
Yes. Low-quality or all-purpose thread produces excess lint, has inconsistent diameter, and breaks under tension — each issue compounds the others and throws off thread control. Embroidery-specific thread with continuous-filament construction and consistent diameter keeps these problems in check.
Why does my embroidery machine keep jamming even after I rethread it?
Recurring jams after rethreading usually point to lint buildup in the bobbin area, a damaged or wrong-sized needle, or a worn bobbin case. Clean the machine thoroughly, replace the needle, and check the bobbin case for burrs or scratches.
When should I take my embroidery machine to a professional for repair?
Seek professional repair when bunching continues after all troubleshooting, when the machine is mechanically locked, or when you hear grinding or clicking during operation. At that point, the machine has worn or damaged internal components that require a technician.