This guide walks through every step: choosing the right needle, preparing your thread, threading it correctly, and securing it so it stays put. Whether you're picking up a needle for the first time or trying to break a frustrating habit, the steps below will help you start every project clean.
Key Takeaways
- Match needle size to thread weight to avoid fraying, tension problems, and mid-project thread breaks.
- Cut thread to forearm length (12–18 inches) to prevent tangling and fiber weakening.
- Separate strands before threading; hidden twists form otherwise and tighten mid-stitch.
- Use the fold-and-pinch method for most threads.
- Switch to the pinch-and-saw technique for fine or metallic thread.
- Replace needles when thread starts fraying without explanation because burrs shred fiber on contact.
What You Need Before You Start
Gathering your tools first removes friction from the threading process itself. Hunting for scissors mid-setup leads to rushed cuts and frayed ends.
Essential Equipment
- Embroidery or crewel needle — sizes 7–9 cover most beginner and intermediate projects
- Sharp embroidery scissors — dedicated scissors kept for thread only, not fabric cutting
- Embroidery thread — quality matters; threads with a consistent twist and smooth finish, like Isacord, resist fraying and feed through the eye cleanly
Optional but Useful
- Wire-loop needle threader — helpful for fine needle sizes or specialty threads like metallics
- Beeswax or thread conditioner — stiffens thread ends and reduces drag, especially useful with metallic thread or older floss
How to Thread an Embroidery Needle: Step-by-Step
Step 1: Select the Right Needle
Needle type and size both matter. Here's a quick breakdown:
| Needle Type | Tip | Eye | Best For |
|---|---|---|---|
| Crewel/Embroidery | Sharp | Medium-long | Most surface embroidery |
| Tapestry | Blunt | Large | Counted work, cross stitch |
| Chenille | Sharp | Large | Ribbon embroidery, thick threads |
Sizing runs counter-intuitively: the smaller the number, the larger the needle. Per DMC's official sizing ranges:
- Sizes 7–9: 1–4 strands of stranded cotton
- Sizes 3–5: 4–6 strands or heavier floss
- Sizes 1–3: Heavy threads like perle cotton #3 (which WonderFil recommends pairing with a size 18 chenille needle)
When uncertain, Mary Corbet at Needle'nThread notes that size 7 is a reliable starting point for 2–3 strands of floss.
Step 2: Measure and Cut Your Thread
DMC recommends cutting thread to approximately fingertip to elbow — around 18 inches. Longer thread passes through fabric more times than necessary, weakening its twist and increasing tangling.
Use sharp embroidery scissors and cut straight across. A frayed or angled end is the main reason thread refuses to pass cleanly through a needle eye, so a clean cut matters more than it seems.
Step 3: Separate the Strands
Standard embroidery floss has 6 strands twisted together. Most projects use 2–3 strands, which means separating them before threading — not after.
The Y-separation technique:
- Hold the thread bundle near the top
- Fan the strands to create a Y-shape
- Slowly pull the required number of strands straight up while holding the rest loosely
Rushing this step causes the remaining strands to coil and knot below your fingers — pull steadily.
Step 4: Thread the Needle
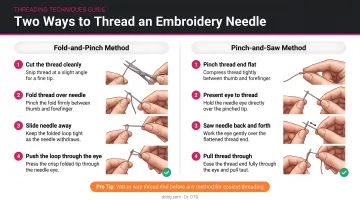
Two methods work for most situations:
Fold-and-Pinch (best for standard threads):
- Fold the thread over the needle shaft
- Pinch the fold tightly so only a hair-thin loop is visible
- Slide the needle out while maintaining the pinch
- Place the needle eye over the exposed fold and push down until the thread pops through
Pinch-and-Saw (best for metallics, silks, or fine needles):
- Trim the thread end so it's clean — not puffy or frayed
- Pinch so only the very tip shows between fingers
- Lay the needle eye against the thread tip
- Use a gentle side-to-side sawing motion to work the thread into the eye — rotating the needle 180° can help if one side of the eye sits more open
If both methods fail, a wire-loop needle threader works as a reliable fallback: insert the loop through the eye, pass thread through the loop, then pull the threader back out.
Step 5: Knot or Anchor the Thread
Two approaches for securing the starting end:
- Tail knot: Wrap thread around the needle 3–4 times, grab the coils, and slide them down the thread to form a knot at the end — a quick option when you need to get started fast.
- Anchor stitch: Pick up a tiny amount of fabric on the back, pass the needle through the resulting loop, and pull snug. The Royal School of Needlework describes this as a holding stitch — invisible and professional.
After threading, leave a 2-inch tail on the short end of the thread. This prevents the thread from pulling free mid-stitch when you're focused on your work.
Key Variables That Affect Threading Results
Even with correct technique, four variables consistently determine whether threading goes smoothly — and stays that way.
Needle Size vs. Thread Weight
The needle's eye should accommodate the doubled thread (where it folds at the eye) without resistance or visible bunching. Too small and the thread frays; too large and it leaves visible holes and sits loose.
Test on a scrap piece of fabric first. A well-matched needle passes through with a soft pop — not a drag or a tear.
Thread Length
Thread beyond 18 inches creates more friction with each pass through fabric, weakening the fiber's twist and producing the "zipper" sound that indicates friction damage. Shorter lengths maintain consistent tension and prevent mid-project knots.
Thread Quality and Condition
Old or stored thread dries out and splits at the cut end, making threading difficult regardless of technique. Fresh, quality thread — like Isacord, which carries a consistent twist and smooth finish — enters the eye cleanly and holds up under repeated stitching passes.
Lighting and Workspace Setup
Threading requires precision. Poor lighting makes the needle eye nearly invisible and increases threading errors. A bright, directed light or magnifying lamp reduces threading attempts and makes strand-counting more accurate.
Common Mistakes When Threading an Embroidery Needle
Three mistakes trip up most embroiderers — and all three are easy to avoid once you know what to look for.
Wrong needle size — the most frequent error is grabbing whatever needle is nearby. Too small frays the thread and makes it hard to pull through; too large leaves visible holes and lets the thread slip free. Test on scrap fabric before committing.
Thread that's too long — longer thread feels efficient but weakens faster, tangles more readily, and is harder to control. Cutting a fresh 18-inch piece is always faster than untangling a mid-project knot.
Skipping strand separation or a clean cut — threading multiple strands directly from the skein without stripping creates hidden twists that tighten mid-stitch. Threading a frayed end means the thread fans out and refuses to pass through the eye. Strip your strands individually and snip a clean, angled cut before threading.
Troubleshooting Common Threading Problems
Thread Keeps Fraying at the End
Trim the thread end with sharp scissors before threading — dull scissors or a skipped trim are the most common culprits. If fraying persists right after cutting, run a fingertip along the needle eye. Roughness means a burr. Needle'nThread confirms that burrs on needle tips or rough, unpolished eyes fray and shred thread on contact. Replace the needle; burrs can't be safely repaired.
Thread Won't Pass Through the Eye
Usually the thread is too thick for the needle, the cut end is still frayed, or the fold-and-pinch grip isn't tight enough. Try these fixes in order:
- Switch to a needle one size larger
- Re-trim the thread end with sharp scissors
- Tighten the pinch until only a thin fold is visible — too much thread showing causes bunching
- Apply a small amount of beeswax or thread conditioner to stiffen the end
Thread Tangles or Knots Repeatedly While Stitching
The three most common causes: thread cut too long, strands not properly separated before threading, or natural twist building up mid-project.
Cut a shorter length and let the needle hang freely mid-stitch to untwist. Make sure strands were stripped using the Y-separation method before threading — improperly separated strands trap twist from the start.
Thread Breaks Repeatedly Mid-Stitch
Repeated breaks usually point to one of three problems: the needle eye is too small for the thread weight, the thread is old or low quality, or a burr is creating micro-cuts in the fiber.
- Switch to a needle with a larger eye
- Inspect the needle for burrs and replace it if found
- For delicate fibers like silk, apply thread conditioner to reduce friction during stitching
Frequently Asked Questions
Can you embroider viscose?
Yes, but viscose (rayon) fabric's slippery, stretchy nature requires a stabilizer to prevent distortion during stitching. Use a sharp crewel or embroidery needle in an appropriate size and monitor tension carefully — viscose puckers easily under uneven pull.
What needle size should a beginner use for embroidery?
Sizes 7–9 crewel or embroidery needles are the most approachable starting point. They accommodate 1–4 strands of stranded cotton floss, thread easily, and work on common fabrics like cotton and linen without leaving visible holes.
How long should embroidery thread be when threading a needle?
Approximately fingertip to elbow — roughly 12–18 inches. Anything longer risks tangling and fiber weakening from repeated pulls through fabric.
Do I need a needle threader for embroidery?
No, but they're genuinely useful for fine needle sizes (9 and above), metallic threads that resist threading, or stitchers with vision difficulties. A wire-loop style threader works with most standard embroidery needle types.
How do I stop my embroidery thread from tangling while stitching?
Three quick fixes: keep thread under 18 inches, let the needle hang free periodically to untwist, and make sure strands were properly separated using the Y-stripping technique before threading.
How often should I replace my embroidery needle?
Replace when thread frays without cause, the needle drags through fabric, or at the end of any significant project. Needle'nThread recommends swapping needles after roughly 20–25 hours of use for regular stitchers.